
Integration Guidelines
Contents
Integration Guidelines
- Setting Up Your Local Folder Structure
- Using UTF-8 Character Encoding
- Images
- Media Files
- Supporting Files
- Automatic Tracking of Outbound Links
Set Up Your Page Information and Content
Your goal is to achieve the best search engine rankings and maximum traffic.
Put your best foot forward. Review the Integration Guidelines below (and the SBI! Built-in Functions help, coming up) before you start building your pages.
Follow this advice and you will not have to spend extra time later to make them compatible with the Upload Your Own HTML process.
Take your time and read the guidelines carefully to ensure that every page you create uploads flawlessly and works perfectly.
Understand that we cannot troubleshoot HTML errors (i.e., "Why does my page look funny?") or problems with your HTML editor.
We do support any technical glitches with the page-uploading/re-uploading process.
Ask for help at the SBI! Forum dedicated to HTML and CSS...
https://forums.sitesell.com/viewforum.php?f=8
Ready to begin?
In a nutshell, here are SBI!'s uploading and integration "rules" (detailed instructions will follow)...
-
All HTML files must use the .html extension (not ".htm") or SBI! will not allow you to upload your page.
-
Place all your images in a folder called image-files.
Supported image file types: .gif, .jpg, .jpeg, .png, .webp -
Place all media files in a folder called media-files.
Supported media file types: avi, .mov, .mp3, .mpeg, .mpg, .pps, .ppt, .qt, .wav, .wma, .wmv -
Place all other supporting files in a folder called support-files.
Supported support file types: .css, .js, .json, .pdf, .txt, .xml, .zip -
Your HTML files will reside at the same level (the root level) as the image, media, and support folders (see below for details).
-
SBI! will not accept any file types other than those listed above.
-
Important Note: Do not create any other additional folders or nested folders (a folder inside another folder).
Important Note: SBI! Is Not a "Media Server"
You cannot use SBI! media file URLs on other sites. For example, if you want to host a video from SBI! on your WordPress blog or on a non-SBI! website on another host, it will not play. Please host the video on that other host. This includes Flash files uploaded to the support-files folder.
Or use a YouTube, Vimeo or Wistia account to host the video. Or host it on a hosting service dedicated to storing large files, such as Amazon's AWS.
Here are the detailed instructions for duplicating the SBI! site structure on your computer...
Setting Up Your Local Folder Structure
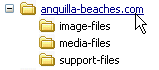
On your computer, create a "root folder" and label it the name of your site (e.g., "anguilla-beaches.com"). Now create three other folders inside your root folder...
-
image-files folder
-
media-files folder
-
support-files folder
Upon completion, your folder structure should look like this...
Note
If you designed your template in Site Designer, and then downloaded the template package, first create a folder called "sd" (no quotes) inside the root folder. Inside sd, add any of the design images or CSS files that were in the folder than you downloaded. (Create all other folders in the root folder.)
Local Folder Structure Tip
-
Do not create any additional folders, or any nested folders (e.g., do not create a new folder called "baby-movies" and place it inside your media-files folder). SBI! will not accept them.
All image, media and supporting files must be called directly from one of the three folders listed above.
Now let's cover the details for each file type, and where you must place them in your folder structure.
HTML Files
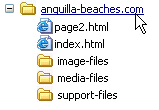
Create and edit all of your HTML files (adding the ".html" extension to each of them) in the root folder. This matches the "root level" where SBI! builds all HTML pages, and where your HTML files go when you upload them.
For example, if you add two HTML files to your site, your folder should now look like this...
Using UTF-8 Character Encoding
SBI! uses UTF-8 on all of your pages. For best results, copy the following tag and paste it into the head section of your HTML template if it's not already there...
<meta http-equiv="content-type" content="text/html; charset=utf-8">
This will ensure that any special characters that you use, like © and ™, will display properly on your pages.
Click here for more information about using UTF-8.
Images
All image files (.gif, .jpg, .jpeg, .png, .webp) must be placed in the image-files folder that you created above.
When correctly inserted into your page, you will be prompted to select and upload these images in Step 3 of the Upload Your Own HTML process.
Tips
-
When creating your HTML pages, relative-reference your images, and make sure that image-files/ appears before each file name, like this...
<img src="image-files/myimg1.gif">Relative referencing ensures proper display of your images when you preview pages in your editor or locally in your browser (use File > Open to view files locally).
-
Add width and height dimensions for each image, along with an alt attribute description (using the page's keyword in the alt text may give you bonus traffic from image searches).
You could also add (optional) a title attribute -- title="description of the image" -- which displays a short "tool tip" message in a small window when visitors hover their mouse over the image (this works in all browsers except Internet Explorer, which is the only one that displays the alt attribute text).
So a complete image tag might look like...
<img src="image-files/beach-sunset.gif" alt="Anguilla beach at sunset" title="Another beautiful sunset over an Anguilla beach" width="250" height="180"> -
Images you reference in a CSS stylesheet file will also be found, and you will be asked to upload them, if you store them in the image-files folder.
You can absolute reference these files (https://www.domainname.com/image-files/) or relative reference them using "../image-files/" (be sure to include the two dots before the slash).
-
Before uploading, verify that all image references are correct. If you don't reference your images correctly, SBI! will not ask you to upload them in Step 3.
-
If you need to edit any of your images (resize, crop, add a watermark, etc.), the Image Library has a browser-based editing system that lets you do a lot to an image.
Yes, you can use images that have already been uploaded into SBI!'s Image Library. Here's how...
SBI! uses a folder named "images" to store all graphics that are uploaded via the Image Library. Therefore, when you create your HTML pages, instead of referencing image-files/myimg1.gif (as explained above), use images/myimg1.gif.
Here's an example tag that references an image in the Image Library...
<img src="images/beachwalking.jpg" alt="Walking on an Anguilla beach" title="Taking a stroll on a long Anguilla beach" width="265" height="150">
Note, however, that you will not be able to view these images if you use the relative reference above. If you want to be able to view the images in your editor, use the absolute (full URL) reference.
Media Files
All media files (.avi, .mov, .mp3, .mpeg, .mpg, .pps, .ppt, .qt, .wav, .wma, .wmv) must be placed in your media-files folder.
When correctly inserted into your page, you will be prompted to select and upload these media files in Step 3 of the Upload Your Own HTML process.
Tips
-
Relative-reference all of your media files for easy previewing and/or testing.
-
The HTML coding of these media files is dependent on the type of media and options that you want to use.
If you don't know how to add a particular media file (or its coding options) into your HTML page, visit the Audio, Video, Flash, XML/RSS, Other forum, where you'll receive excellent help and advice from some of SBI!'s resident experts.
Supporting Files
All supporting files (.css, .js, .pdf, .txt, .xml, .zip) must be placed in your support-files folder. Like the rest of your files, you should relative-reference your supporting files when coding your HTML page. Do this, and your pages will preview correctly on your computer before you upload them to SBI!'s servers.
Must Read Notice Regarding ZIP Files
If SiteSell receives a documented (proved) complaint that your .zip file contains a virus, your SBI! account will be terminated immediately, with no refund. This applies to you even if you upload a file that you did not create yourself.
To protect yourself, run your virus scanner on any file(s) contained in a .zip file you plan to upload. If the file is clean, then upload it.
When correctly inserted into your page, you will be prompted to select and upload these support files in Step 3 of the Upload Your Own HTML process.
Important Note
If you want to use the SBI! Breadcrumb Trails automated process, you'll need to style the breadcrumbs using the CSS code below. Be sure to customize it to match the look of your site after it adding it to your stylesheet. Then upload the file with Quick Upload It!.
#PageWrapper .BreadcrumbBlock .BreadcrumbTiers {

	list-style: none;

	margin:30px 0 0;

	padding:0;

}


#PageWrapper .BreadcrumbBlock .BreadcrumbTiers .BreadcrumbItem {

	display: inline-block;

}


#PageWrapper .BreadcrumbBlock .BreadcrumbTiers .BreadcrumbItem + .BreadcrumbItem::before {

	padding: 8px;

	color: black;

	content: ">";

}
Automatic Tracking of Outbound Links
One of SBI!'s features is built-in tracking for each link that you create that goes off of your site (outbound). SBI! will automatically re-code all of your outgoing links in order to track and report the click-through rate. These stats are reported in the Click Data section of the TrafficCenter in Site Central.
Let's say, for example, that you have an affiliate link to refer visitors to your merchant partner's site at...
<a href="https://www.abc.com/youraffiliateID">
You insert the link on this page...
www.yourdomainname.com/referring-page.html
After you upload your referring-page.html file, you'll see that SBI! has added some tracking information to your https://www.abc.com/youraffiliateID affiliate link (do a View > Source on your page). It will look like this...
<a href="https://www.abc.com/youraffiliateID" onClick="window.location.href='https://www.yourdomainname.com/cgi-bin/counter.pl?url=https%3A%2F%2Fwww.abc.com%2FyouraffiliateID
&referrer=https%3A%2F%2Fwww.yourdomainname.com%2Freferring-page.html'; return false;">
You can now track click-throughs from the origin ("yourdomainname.com/referring-page.html") to the destination ("https://www.abc.com/youraffiliateID").
If you do not want SBI! to reformat and track your links, add the following to your link code...
***no_tracking*** and ***/no_tracking***
The format looks like this...
<a href="***no_tracking***https://www.externalsite.com/
filename.html***/no_tracking***">link text</a>
The added code must be inside the quotation marks.
This extra code tells SBI! not to add tracking code to the link. When the page is built, the added code will disappear, leaving only your original link code.