
Breadcrumb Block
Contents
Breadcrumb Block
The Breadcrumb Block is a "magic" block.
Add it to a Sitewide Dot, and, even though it's common to all pages, each page will show the correct breadcrumb trail. And those pages with no assigned trail will show nothing at all.
If you have Content 2.0 invitations on your site, you can have the system automatically add a breadcrumb trail to each submission for each invitation. You can set that option in the Breadcrumb Trail Library.
There are two different processes for breadcrumb trails: assigning (or configuring) one for a new page or an existing page, and modifying an existing trail.
Assigning/configuring a trail begins in the Page Information overlay. Modifying a trail uses a picker, which opens from the Breadcrumb Block toolbar.

See the Page Information help for details on assigning a breadcrumb to a new or existing page.
Editing
The Editing section gives you access to the picker to change an existing breadcrumb trail, or change its crumb text (label).
Click on the Modify Breadcrumb Trail button to use any of the following options.
Use Breadcrumb Trail Set in Page Info
When you drag the Breadcrumb Block to a Sitewide Dot for the first time (or outside a Sitewide Dot if you want to add a second trail to a page), you'll see a warning that you have not yet set a trail for that page.
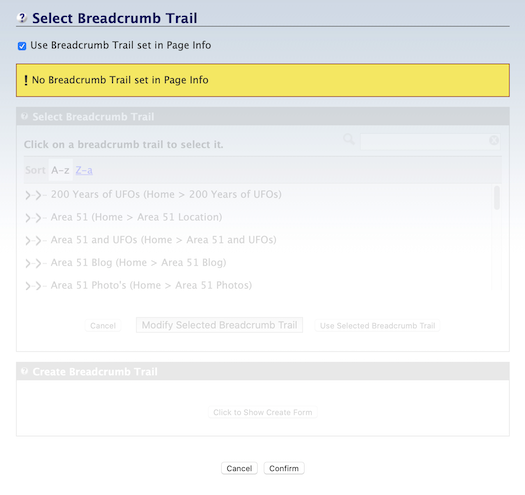
For all remaining pages of your site, clicking on the Breadcrumb Block and then clicking on Modify Breadcrumb Trail button in the toolbar brings you to the same warning.
Uncheck the box above the yellow warning.
This reveals the picker. Use it to select an existing trail or create a new one.
Next is another way to select a breadcrumb trail for an existing page. You may prefer to use that method.
In-Block Warning
If the Breadcrumb Block is already in the Sitewide Dot, you'll see a warning message on each page you edit...
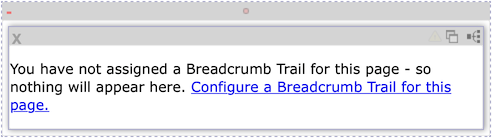
Click on the link to open the Page Information overlay. The advantage of using this method is that you can change the crumb text from the default text (the NavBar label for Tier 2 pages, and the Specific Keyword for Tier 3 and below) to something different.
See the Page Information help for details on assigning a breadcrumb to a new or existing page.
Select Breadcrumb Trail
If you've already created some breadcrumb trails in the Breadcrumb Trail Library for Tier 4 pages, or already customized the crumb text for pre-existing Tier 2 trails, then they're ready to use with no modifications required.
Reminder: You don't need to create Tier 3 breadcrumb trails. Simply assign a Tier 2 trail in Page Information, customize the Tier 3 crumb text, and save the settings.
- Click on a breadcrumb trail to highlight it.
- Click on the Use Selected Breadcrumb Trail button to add that trail to the page.
- Or click on the Modify Selected Breadcrumb Trail button to edit the trail.
- If modifying the trail, delete the Tier 2 portion (or the Tier 2 or 3 portion of a Tier 4 trail). Or click on the gear icon to select different crumb text (label).
- Click on Modify This Breadcrumb Trail to save your changes.
In that case, simply select the trail you want to use from the Select Breadcrumb Trail section of the picker and click on the Use Selected Breadcrumb Trail button to add it to the page.
After previewing the page, you may decide to customize the crumb text. Close the picker and click on the link in the warning message in the Breadcrumb Block, or click on the Edit Page Info button at the top of the page.
Add the custom crumb text to the Page Breadcrumb Label text box.
Create Breadcrumb Trail
Once inside the picker, you also have the option to create a new breadcrumb trail.
Note, however, that the only options you have to change the crumb text (label) are the ones provided after you click on the gear icon for the crumb. If you want to customize the crumb text, you'll need to go to Page Information, adding the custom crumb text to Page Breadcrumb Label.
- Click on Click to Show Create Form.
- Drag a page to the Tier 2 section of the trail. If you're creating a Tier 4 trail, also drag the related Tier 3 page to the Tier 3 section of the trail.
- Edit the crumb text (label), if desired.
- Click on Create Breadcrumb Trail.
If you want to create a new trail in the picker, click on Click to Show Create Form.
You'll see the same builder as in the Breadcrumb Trail library.
Drag a Tier 2 page to the Tier 2 portion of the trail. If this will be a Tier 4 trail, drag the Tier 2 page and then the related Tier 3 page to the trail.
Click on Create Breadcrumb Trail to save your new trail.
Important Note
You'll also use the Manage function to select an existing breadcrumb trail while building a Tier 3 or Tier 4 page in BB2.
Align
You set the breadcrumb trail's alignment in Site Designer. However, you may have a special need to change the alignment on a per-page basis.

The default alignment has a border around its button.
- Click on the button for the alignment you want to have for this trail.
Click on the button for your desired alignment for this breadcrumb only.
If you want to change the alignment for all breadcrumbs, make that change in Site Designer.