
Styling the Template Header
There are three different types of headers in the templates...
-
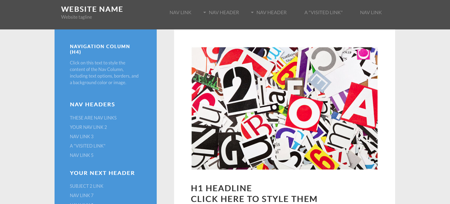
Some have no header image. They have only the Website Name, the Website Tagline, and the horizontal navigation (which shows as a menu button on mobile devices).
These ones have an image at the top of the Content Column.
-
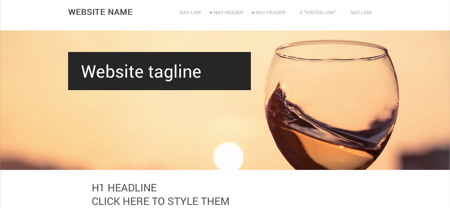
Some have a header image that's the full width of the browser window. This image grows wider as the window gets wider. (The content area also grows wider as the window widens.)
-
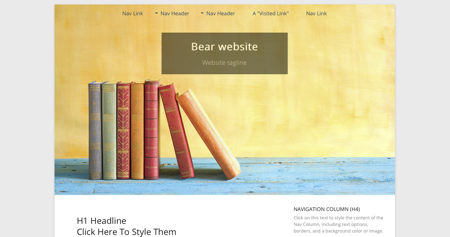
The rest have a header image that's constrained by the boundaries of the page wrapper. As the window widens, the width of the header image and the content area remain the same.
Select Header from the menu to customize the header image (if there is one).
If you prefer, you can upload a new header image, replacing the one that comes with your template.

If you're ever unsure what a button does, hover over it for a second. Its function will appear as a tooltip.
You have several options for the background of your header. Keep it as is, click on the Color Palette button to change the background color, or upload a new header image. You can also design and add a logo to the existing or new header image.
Background
![]()
Background Color
This option sets the background color if you don't want to have a header image.
- Click on the Color Palette button.
-
Click on the palette to select a color. Use the rainbow slider to reach the color base you want to use in the palette.
Or enter a 6 character hex value. Or, if you've already saved colors, choose one from Your Custom Colors. You can also select Transparent.
Or click on Reset to Template Default to go back to the original background color. - Click Set Background Color to save this selection. Click Cancel to close the tool and make no change.
Click on the Color Palette button to open the color picker overlay.
Select your color by clicking on the palette or dragging the small circle around the palette. Click on the rainbow slider to reach the desired palette of colors.
Or you can enter a 6-character hex value for the color you want to use.
You can also choose from a color in Your Custom Colors, which is available after you've selected at least one custom color in any of the color pickers. Hover over any color to see where else in your template you've used that color.
Another option in most of the background color pickers is to choose Transparent. This will make the background of the Header the same color as the page wrapper.

Click on Set Background Color to save your change. The overlay window will close and your new background color will be set.
Add Background Image
- Click on the "Camera" button to open the overlay window.
- Browse to and select an image to upload.
- Click on Upload New Background Image.
You can upload a new header image.
If you upload an image here, always double-check that everything is displaying the way you want it to display.
Remove Background Image
- Click on the Remove Image button to remove the current background image.
If you decide that you don't like the current background image, use this tool to remove the image.
The image appearing in the style will disappear.
Reset
- Click on the Reset button to return to the default background image or the last saved image.
You can also reset all the changes you made to the background image, which restores the default image that came with your style, or the last saved image.
This resets only the image settings for the Header image of your style (and not the Wrapper Background image).
Advanced Styles
- Click on the gears button to open the Advanced Styles overlay.
-
Click on Position V and select from Top, Center and Bottom.
And/or click on Position H and select from Left, Center and Right. - Click on Size and select from auto, 100% auto, auto 100%, contain and cover.
-
Click on the Background Repeat Down arrow button to activate image tiling vertically.
Click on the Background Repeat Right arrow to activate image tiling horizontally. - Click again on the Down arrow button to deactivate tiling vertically. Click again on the Right arrow to deactivate tiling horizontally.
- Click on the Download Background Image Down button to download the image for customization.
You have full control over the header image.
You can change the position of the image (Position V or Position H) or tile it down the browser window or across the window (Down arrow and Right arrow buttons).
You can also change the size of the image. These are your options...
-
auto -- This setting retains the image's original dimensions (e.g., 600x300). So the image will look more "zoomed in" than 100% auto, next.
-
100% auto -- When percentages are used, the image dimension is based on the element that contains the width of the image. This setting is based on the Page Wrapper container width.
-
auto 100% -- The image dimension is based on the element that contains the height of the image. This setting is based on the Header container height.
-
contain -- This setting grows or shrinks the image inside the container, which, for the Site Designer responsive templates, is the full width of the Content Column (1-col template), including padding and margin, or the total width of all the columns (2-col and 3-col (custom) templates), including padding and margin.
-
cover -- This setting grows or shrinks the image inside the container, but if the container has a different ratio (width to height) than the image, the image is cropped to fit the container.
You can also download the image for customization. Then upload it again.
Header Image Logo
You can add a logo to your header image. Click here for full instructions on how to do that.
You may, however, prefer to use the Website Name and Tagline styling toolbars to add branding text to your header rather than a logo image. See the help here and here.
Resize Height
- Click on the Up arrow button to make the height smaller. Keep clicking to continue making it smaller.
- Click on the Down arrow button to make the height bigger. Keep clicking to continue making it bigger.
If you would like to make the header image smaller in height (which will show more content "above the fold"), or bigger, use the Resize Height buttons.

If you have the perfect image to use for your header, but its height dimension is different from your template's default height, you can make the header area fit to your image.
If your image's height is smaller than the default, click on the Up arrow button to reduce the header size.
If your image's height is larger than the default, click on the Down arrow button to increase the height of the header.
It's important to view your header image in the viewport size for tablets and mobile devices, as the desktop image likely will not display well on small devices. You may even want to upload a mobile-sized header image when customizing the template for mobile.