Pic It! Image Editor
Contents
Pic It! Image Editor
The Pic It! image editor lets you customize any image that you upload to the Image Library.
This help covers how to use the tools. For more information on the various customizations you can make, see this TNT HQ article...
Using the Pic It! Browser-Based Image Editor
Using the Pic It! Image Editor
Pic It! has four main sections -- the buttons in the top right, the image you're editing, the tools, and the editing options.
Buttons
In the top right corner of Pic It! are three large buttons.

Save -- the Save button saves the changes you made to the image showing in Pic It!. The changes are stored on the SBI! servers. After saving the image, you end up back in the Image Library.
When you add the image to a page of your site, the customizations you save here will appear on the page. Any page that already uses that image will have the newly customized image appear.
Download -- the Download button lets you download the image after you customize it. Use this option if you want to download customized images to save to your Pinterest boards.
Cancel -- the Cancel button returns you to the Image Library without saving any changes to the image.
The Image
The image that appears here is the one you selected in the Image Library. All customizations you make appear on the image. None of them are permanent until you save the image.
The Tools
Just below the image is the tools section, on a dark gray background. The Filter (see below) option's tools are the default view.
The Customization Options
Below the Filter's tools, on a black background, are all the editing options. Click on an icon there. The tools for that editing option appear on the dark gray background just above it.

The customization options include, from left to right...
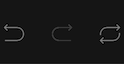
Undo (Curved arrow pointing to the left) -- Undo the last change you made.
Redo (Curved arrow pointing to the right) -- Redo the change you just undid using the Undo option.
Reset (Two curved arrows) -- Undo all changes and set the image back to what's stored on SBI!'s servers.
Delete (A garbage can) -- Similar to Undo, it removes the active Shape, Icon or Text customization (the one you clicked on). Click on Undo if you change your mind.
Delete All (A garbage can with the word ALL) -- This option removes all the active Shape, Icon and Text customizations you added. Use Undo to restore them all. Delete All does not reset the image, so any Crop, Flip, Rotate or Draw is not affected by Delete All.

Crop (Two right-angle lines intersecting each other) -- Cut away (crop) all the parts of the image you don't want. Your options include Custom, Square, 3:2 ratio, 4:3, 5:4, 7:5 and 16:9.
Flip (Rotating the image 180°) -- Flip the image vertically (X) or horizontally (Y).
Rotate (Angling the image) -- Rotate the image by 30° in either direction, or by the Range you select using the slider.
Draw (Draw lines on the image) -- Draw attention to something in the image by drawing a Free (free-hand) circle around it. Select Straight to draw straight lines. Range sets the width of the line.
Shape (Add a geometric shape) -- Add a rectangle, circle or triangle to the image.
Stroke creates the border. Fill lets you fill the interior for a solid shape, or use no fill color (the option with a red slash through it) for a "see-through" shape. Stroke determines the thickness of the lines that create the shape.
Icon (Add a pre-set shape) -- Add three different types of arrow, two different stars, a polygon (a hexagon), a location pin, a heart, or a text bubble. Or upload and use a custom icon.
(Note: An icon here is defined as a solid shape. Uploading a Facebook icon, for instance, will result in a solid square of color.)
Text (Add text to the image) -- Click on the image. The words "Double Click" (no quotes) will appear on the image.
This activates the Text options, which include Font family, Bold, Italic and Underline, Left, Center and Right Alignment, and the text Color. Use the slider to set the Text size.
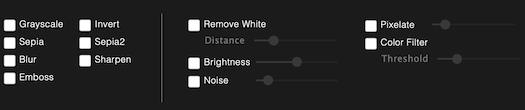
Filter (The default view) -- Add a check to any of the tools to add that customization to the image.
Using two or more of these at the same time may give you some weird effects, so decide on what your visitor's will find helpful or attractive, not on what you like.
Click on any tool icon to hide the dark gray tools section. Click on any icon to show the tools section again.

Moving Elements and Changing Element Sizes
The image in the screenshots below is all black, to make it easier for you to see the move, resize and rotate elements.
Moving an Element
Hover over the element (a yellow triangle in the screenshot below). Note the white dots on each corner, in the middle of each side, and extending from the middle dot on the top of the rectangular outline around the triangle.
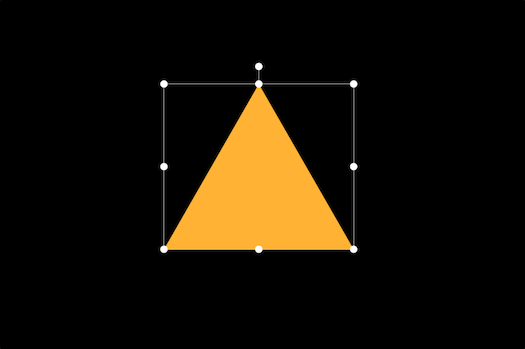
Hover over the image. The cursor changes to a four-direction arrow. Click and hold, then drag the element where you want it on the image.
Resizing an Element
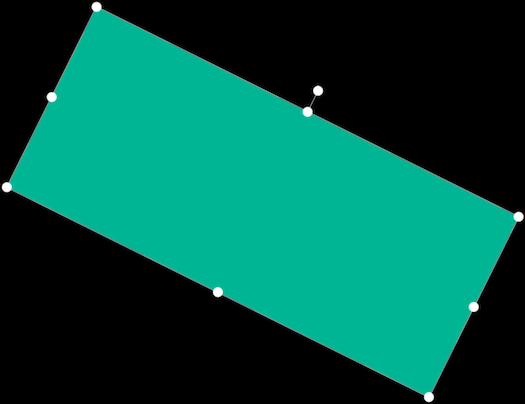
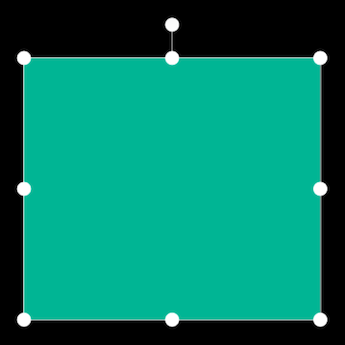
In the screenshot below, a green rectangle has been added to the image.

Click and hold on any corner dot and drag away from the element to make the element larger equally for both the width and the height. Drag towards the middle of the element to make it smaller equally for both width and height.
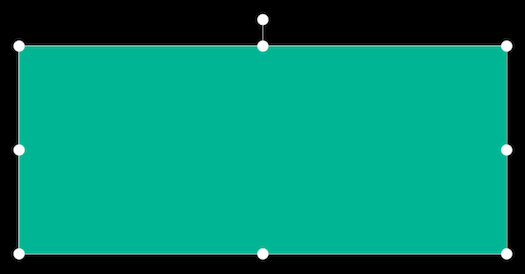
This is the image resized by dragging the dot on either the left or right side away from the middle, which affects only the width. The dots on the top and bottom affect only the height.
This is the image rotated by clicking on and dragging the "handle," the dot connected to the dot in the middle of the top of the rectangle.