
Blueprint It!
Blueprint It! is the "third half" of Brainstorm It!.
If Brainstormer is the right side (the creative side) and the MKL is the left side (the analytical side), Blueprint It! is the "eyes that see the big picture."
It's the tool that you'll use to transform your list of keywords into your Site Content Blueprint, which you'll use to create your site.
You don't have to plan your entire Content Blueprint now. Determine how many pages you plan to create in the next 6-12 months, and organize that many keywords.
Important
Blueprint It! uses the same layout as the MKL, and some of the same tools. But those tools have different options. So read this entire help before you begin. This will ensure that you know where to find the tools to do various tasks.
Blueprint It! also has drag-and-drop functionality, which isn't noticeable just by looking at it. Again, read the help to learn how to use it.
The first time you look at Blueprint It!, it will likely be empty. This is because you add the keywords to it, using the Send to Blueprint It! action in the MKL's Select Action menu. You can send all the keywords in your MKL (not recommended), a Tier 2 Group's keywords, or as few as one at a time.
If your Blueprint It! is empty, click here to go to the MKL help for Send to Blueprint It! instructions.
Columns
Since Blueprint It! is only used for your Content Blueprint, it has only the columns you'll need to help you organize it. Those are...
-
Keyword
-
Value Demand
-
Real Supply
-
Profitability
-
Notepad
-
Headline Ideas
All the numbers for each keyword, and any notes you added in a Notepad, are transferred over from the MKL.
If you don't want to use a particular column, click on Columns in the toolbar. In the overlay that opens, remove the check for that column. Then click on the large X on the gray circle to close the overlay and save your change.
There's also an optional Pages column, which indicates if you've used a keyword for the content of a published page.
Headline Ideas
- Click on the Edit link for a keyword. This opens an overlay.
- Type or paste in your headline idea.
- Click the Save button.
Headline Ideas is a new column. Click on the Edit link for a keyword. This opens an overlay.
In that overlay, type or paste in any possible headline you have for this page. Focus on main (H1) headline ideas, but if you come up with some subheadlines (H2 or H3), enter those as well.
Click the Save button to save your headline ideas.
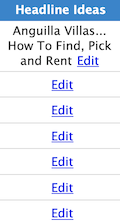 The headline appears as plain text in the Headline Ideas column, pushing down the keywords that follow it.
You can add as many headlines as you want in the overlay.
If you add each one on a new line, only the first one will appear in the keyword row. If you want them all to appear in the row, they all must be added in the overlay as one long paragraph.
Pages
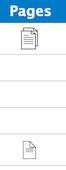 The Pages column, also available in the Master Keyword List, indicates which keywords you've used to publish content on your site.
A double-page icon indicates that you published two or more pages with that keyword (e.g., your Site Concept Keyword will display this icon, since the home page and the Blog It! page both use the Site Concept Keyword).
A single-page icon indicates that you published one page with that keyword.
Click on any icon in the Pages column to open an overlay showing the title(s) of the page(s) published using that keyword. Click on the title to view the live page.
Tier 1, Remove, Delete From MKL, Download
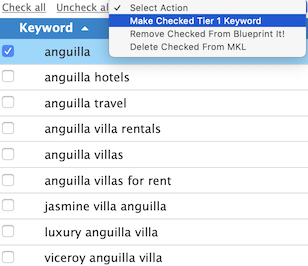
The Select Action menu works the same way as it does in the MKL. Any action you select is applied to only the keywords that have a check in the box to the left of them.
The menu contains four tools that let you decide what to do with your keywords.

Make Checked Tier 1 Keyword
- Add a check to the keyword that will become the Tier 1 keyword
- Click on Select Action.
- Select Make Checked Tier 1 Keyword.
- Click OK in the confirmation overlay.
The first keyword you have to think about is your Tier 1 keyword. This is usually your Site Concept Keyword.
If you think another keyword will make a better keyword for your home page, select that keyword to make it the Tier 1 keyword.
The Tier 1 keyword must be set first before you can set Tier 2 and Tier 3 keywords.
To set your Tier 1 keyword, add a check to the box next to it.
Once you have set the Tier 1 keyword for the first time, Blueprint It! will always have one.
If you want to have a different keyword be your Tier 1, check that keyword and then use Make Checked Tier 1 Keyword again.
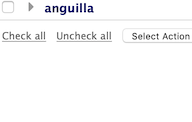
The keyword will appear at the top of Blueprint It!, in bold black text. (All other keywords are unbolded black text.)
Remove Checked From Blueprint It!
- Add a check to the keyword(s) you want to remove from Blueprint It!.
- In the Select Action menu, click on Remove Checked From Blueprint It!.
- Confirm that you want to remove the keyword(s) from Blueprint It! (and leave them in your MKL).
If you decide at some point that you don't want a keyword in your blueprint, you can remove it.
Removing the keyword does not delete it from your MKL.
To remove it, add a check to the keyword, then click on Select Action. Choose Remove Checked From Blueprint It!.
The keyword will disappear from the list. Back in the MKL, the darker gray background that the keyword had (to indicate that it had been sent to Blueprint It!) switches to the regular light gray background.
Delete Checked From MKL
- Add a check to the keyword(s) you want to delete.
- In the Select Action menu, click on Delete Checked From MKL.
- Confirm that you want to delete the keyword(s).
If you don't want a keyword in Blueprint It! and do not want it in your MKL, you can delete it from Blueprint It!.
To delete it, add a check to the keyword, then click on Select Action. Choose Delete Checked From MKL. Confirm the deletion.
The keyword will disappear from the list. Back in the MKL, the keyword is also gone from the list there.
Important
This action cannot be undone. Be absolutely certain that you want to delete the keyword(s) from your MKL. If you change your mind, click on Cancel in the confirmation overlay.
Download Blueprint
- In the Select Action menu, click on Download Blueprint. A CSV file will download to your browser's default downloads location.
If you want to store a record of your blueprint on your computer, you can download a CSV file containing all the keywords in the blueprint, and their location in relation to the other keywords (Tier 1, Tier 2 or Tier 3).
Click on the Select Action menu and select Download Blueprint.
The file, named blueprint.csv, will download immediately to your default downloads location.
Open it in a spreadsheet if you want to manipulate the rows and columns, or open it in Notepad/TextEdit to view the list.
All keywords that have not been assigned a tier display in the first rows at the top of the file. The Site Concept Keyword (Tier 1) is next, in the first column, followed by the first Tier 2 keyword, and its assigned Tier 3 keywords.
The next Tier 2 will follow, then all its Tier 3 keywords. This repeats to the end of the file.
If you assigned some keywords to be Tier 4, they will appear below the Tier 3 keyword you assigned them to.
Tier 2 Keywords
- Click on the keyword that you want make a Tier 2.
- Drag the keyword to and drop the keyword onto the Tier 1 keyword.
Create Tier 2 keywords by dragging keywords and dropping them onto the Tier 1 keyword.
Note that the entire row (including numbers and headline ideas) travels with the keyword.
To drag a keyword, click on it with your mouse or trackpad, and continue holding down the click. Move your mouse until the keyword appears on top of the Tier 1 keyword. Let go of the click to drop the keyword.
You can also drag multiple keywords. Add a check to each keyword you want to make a Tier 2 keyword. Click and hold on one of them. Drag them all to the Tier 1 keyword and drop them.
After you drop the keyword, it appears below the Tier 1 keyword, indented to the right. It also appears in blue text.
And the Tier 1 keyword has a small triangle to its left. This lets you collapse all the Tier 2 keywords (and all keywords associated with them), hiding them from the list. That makes it easier to drop keywords where you want them.

Lower Tiers (3 and 4)
- Click on the keyword that you want make a Tier 3.
- Drag the keyword and drop the keyword onto a Tier 2 keyword.
- To drag multiple keywords, add a check to each one. Click and hold on one of them to drag all of them. Drop them on the Tier 2 (or the Tier 3 keyword if you're moving Tier 4 keywords).
Tier 3 and Tier 4 keywords are added to the blueprint in the same way as Tier 2 keywords.
Click on each Tier 3 keyword and drop it on the Tier 2 that you want to associate it with. The keyword will be indented more to the right. The text will also be blue, but it will be a faded blue color.
Drop Tier 4 keywords onto a Tier 3. They will be indented to the right even more, with a very faded blue color.
To drag a keyword, click on it with your mouse or trackpad, and continue holding down the click. Move your mouse until the keyword appears on top of the Tier 2 keyword. Let go of the click to drop the keyword.
You can also drag multiple keywords. Add a check to each keyword you want to make a Tier 3 keyword. Click and hold on one of them. Drag them all to the related Tier 2 keyword and drop them.
The same applies to Tier 4 keywords.
Each Tier 2 keyword has a small triangle to its left. This lets you collapse all the Tier 3 keywords (and Tier 4 keywords) associated with that Tier 2, hiding them from the list.
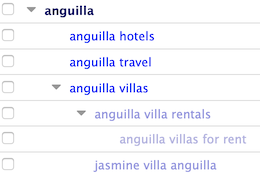
In the screenshot below, you'll see the Tier 2, anguilla villas, with an associated Tier 3, anguilla villa rentals, and a Tier 4, anguilla villas for rent. The Tier 3 keyword also has a triangle, which lets you hide the Tier 4 keyword.
Sorting
The default sort is Keywords, A-Z, in descending order of Tier 2, Tier 3, then Tier 4.
All the Tier 3s attached to a Tier 2 sort A-Z, and all the Tier 4s (there should not be many, if any, of these) attached to a Tier 3 sort A-Z.
Changing the sort order (clicking on the Keyword column header) makes them all sort Z-A in the same descending order of Tier 2, then Tier 3 and then Tier 4.
Direct Link to BB2
Click on a keyword to open a small overlay with a direct link to BlockBuilder. Click on the Create BB2 Page link to open BB2.
In BB2, the new page's Page Information overlay will already have the keyword entered into the Keyword box.
Direct Link to Search Intent Analyst Tai Agent
Click on a keyword to open a small overlay with a direct link to the Search Intent Analyst (SIA) Tai Agent. Click on Determine Search Intent to open the SIA screen on top of the Blueprint It! page.
Enter the keyword into SIA and click on the Submit button.