Customize Your Header/Logo
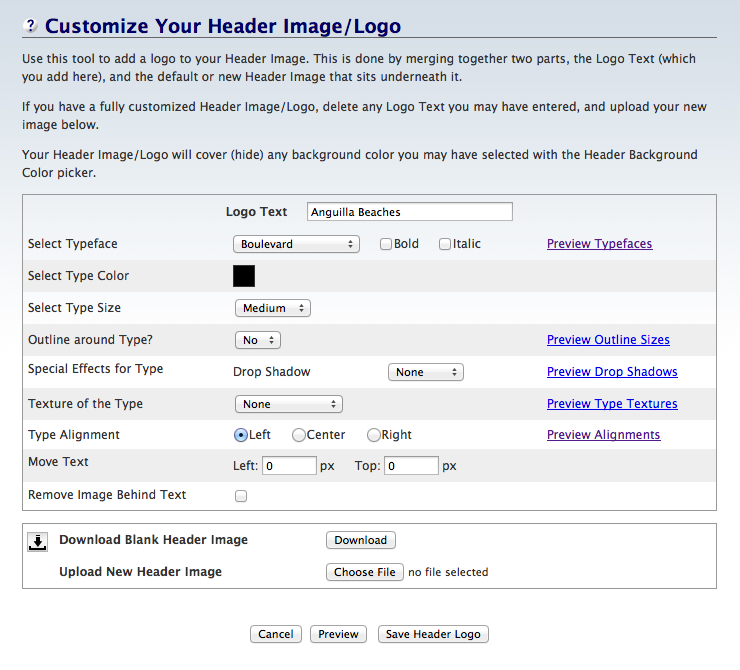
To create the logo on your header image, you'll choose the typeface, color, size, style, effects, textures and alignment/positioning to create a logo that's totally unique... and totally you!
You have the option of downloading the header image with no logo. Use a graphics application (your own, or an online one, such as PicMonkey or Canva) to add other elements to the image, then add your logo text, save the file and upload it.
You also have the option of uploading a completely custom header image.
Make any new image, and your logo, fit with the overall theme of your site, and the mood that you want to create.
If you want to customize all the images used in your template (header image, and any background images for the Body, Page Wrapper, columns or Footer, you can download them all in one zipped package by clicking on this link...
https://sbiapps.sitesell.com/sitebuilder/blockbuilder/transitiontemplate?type=package
You must be logged into your account to use this link. If you have more than one site, you must have that one active (check the top right corner of any page for the domain name) in order to download the package for that site.
Important Note: If you selected a responsive template from the gallery, you have options for the Website Name and Website Tagline, so you don't need to add a logo to the header image.
You can skip reading the remainder of this help file, as it does not apply to your situation.
The Logo-Building Process
-
Enter your Logo Text.
Select the Typeface font. Add a check for Bold and/or Italic.
Select the Type Color. Click on one of the colors in the palette to select it.
Select the Type Size.
Add Outline Around Type (if desired) by selecting a number. Then select the color from the palette.
Add Special Effects for Type (if desired). Select the size of the drop shadow.
Select the Texture of the Type, if desired.
Select the Type Alignment. Center your logo, or align it to the left or right side of the header image.
Enter a Left position offset or a Top position offset to fine-tune the position of the logo on the header.
Or add a check to the Remove Image Behind Text checkbox to have only the current background color and the Logo Text.
- Or click on the Download button to access the header image with no text added. Drag the image to your desktop.
- Or click on the Browse button (Choose File if you're using Safari) and select a new header image to upload, if desired.
- Click on the Preview button to view the entire logo/header image.
- Click on Save Header Logo to save your new logo header image.
The process boils down to this...
1) SBI! takes the header image that's part of your template and uses it for the "background" of the logo that you create here.
You can also choose to upload a new header image, replacing the one that's part of your template. The width of this image must be the same width as the default image. Check the width by hovering over the thumbnail image of your template in the gallery. The template's metadata will display. The header image width is the same as the template's width.
Or you can choose to have no header image, using only a background color with the the Logo Text you type (next point).
2) You type your Logo Text into the appropriate field, set its color and effect options and align it on the header image. (If you upload a new header image, with the logo in the image, you do not have to add any Logo Text.)
Use the Preview button each time you experiment to see what your changes look like overall, especially when adding special effects or a texture to the type, or changing the position of the text.
3) When you're satisfied with your logo, click on the Save Header Logo button. SBI! then merges the logo and the header together and generates a final header image for you.
4) When you're completely satisfied with the result (back in Site Designer), click on the Save Style button to save the changes.
SBI! (re)builds your site with your new header image/logo and makes it "go live" on the Web.
Always remember that if you do not click the Save Style button, your work will be lost.

Special Note About Move Text
There are two options for more precise positioning of your logo text: Left and Top.
Top will move the text down from the top, towards the bottom, by the number of pixels you type in the box. Top works with Left, Center or Right alignment.
Left positioning works differently depending on whether you selected Left alignment or Right alignment (it does not work with Center alignment).
- For Left alignment, entering a number in the Left box will move the logo text that number of pixels to the right.
-
For Right alignment, entering a number in the Left box will move the logo text that number of pixels to the left.
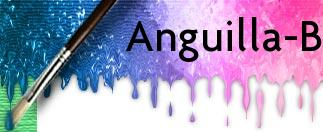
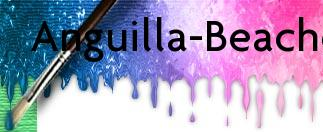
Use this option if there's a design element on the left or right side of the header image. This will force the logo to appear on top of that design image (if desired).
The screenshot below shows an example header image with a design element (a brush). The text, left-aligned, starts to the right of the design element.

This screenshot shows the same header image, right-aligned, with positioning forcing the image to move on top of the design element...

Adjust Top and Left positioning until you have your logo text exactly where you want it. However, do not position it until you have selected a font and a font size, as these will both affect the location of the text on the header image.
Download Header Image
If you'd like to use the existing header image, and add other design elements, or create your logo in a font that's not available in Site Designer, you can retrieve your header image, add what you want, save the file, and upload it.
Click on the Download button. This opens a new window displaying your header image. Click on the image and drag it to your computer's desktop.
From there, use a graphics application or a tool like PicMonkey or Canva to customize the image.
Once you have your header image the way you want it, upload the file and click on Save Header Logo.
Tips
-
Simplicity is the goal. Beginning designers often fall into the trap of confusing cool effects with design. Always remember to stay focused on the overall theme of your site content, and the impression that you want to make on your visitors.
-
Make it easy for visitors to read your logo. Choose a color for the font that contrasts well with the color in the header image. For example, don't choose gray text on a white background, or blue on a black background.
-
Do not use ALL CAPS for your logo. ALL CAPS slows down reading speed by up to 10%, and when used online is the equivalent of shouting or yelling.
-
Many of the logo tools have a preview feature (typeface, outline, etc.). Use those to see what the various options look like before selecting one.
-
Some fonts are bigger than others, so long logo text may run off the end of the header image at certain sizes. If you can't get it to fit by choosing a smaller size, changing the alignment or moving the text, you may have to select a different font (typeface) or come up with a shorter logo that's just as catchy.
-
Some fonts cannot be made bold.
-
If you add italic to your logo, part of the first letter may be cut off. Add one space to the left of the logo text to fix this.
-
A texture is most effective with thick, bold type. It will not be effective if you choose a very cursive, handwriting/script-like typeface.
-
Click on the Select Type Color color square to view the color picker. Change the palette color base with the rainbow slider. Or enter a hex value, or click on one of the colors in Your Custom Colors (if you've already set text, border or background colors elsewhere in Site Designer).
-
Use special effects to subtly enhance your logo. Limit the intensity of these effects (i.e., choose the smaller levels in the menu) to avoid overpowering the typeface.
-
Return at any time (even after you have built your site) to modify the logo. (Your visitors like familiarity, so initiate change only if needed.)
