Upload Your OG Image
Contents
Upload Your OG Image
When a visitor clicks on one of your Like buttons, or adds a comment in the Commenting box at the bottom of the page, that Like or comment appears on the visitor's timeline with a thumbnail from your site.
If you don't have at least one Open Graph image tag (og:image) in the head section of the page, Facebook randomly picks whatever image it wants from the page, which may be totally inappropriate or unrelated (e.g., a copyrighted image, or an AdSense image).
Face It! allows you to upload a special image. It then automatically codes that image as an Open Graph (OG) Image tag and places the tag into the head section of every page (there's nothing else for you to do).
That image will appear in Facebook on any page that does not have any images meeting the OG Image criterion (at least 300x300 in size). If the page has at least one image that meets that size criterion, the system creates an additional OG Image tag for each image.
The Facebook user then has the option to choose from the image set here in Face It!, and the ones that meet the size criterion on the page.
The OG Image you add here must be at least 300x300 pixels, which Facebook will then crop to fit its various uses of the image.

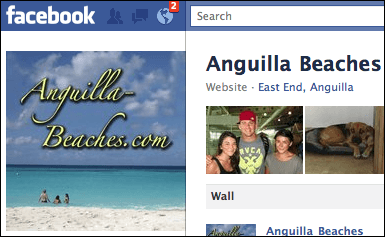
The best image to use for the OG Image is a cropped and resized version of your site's header image. (Although the image above is not part of the anguilla-beaches.com header image, it's close enough to evoke the same brand in the mind of Facebook users.)
If your header image doesn't lend itself to being cropped and resized to 300x300, you may have to create a new one that's very similar.
Creating Your OG Image
If you have Photoshop, GraphicConverter, Pixelmator, iPhoto or another image-editing application, you should be able to create your 300x300 image.
If you don't have a desktop image app, there are online ones you can use. The following TNT HQ article will help you use the Image Library's image editor to create your thumbnail.
https://sbitips.sitesell.com/customizing-images-with-pic-it.html
Remember to add some logo text to this image. It can be your domain name (see the screenshot above), or a phrase that expresses your Valuable PREselling Proposition.
Your image cannot be smaller than 300 pixels wide and 300 pixels tall. If you try to upload one that's narrower or shorter than 300px, you'll receive an error message, advising you to select a larger image.
Selecting and Uploading Your Image
Once your image is ready, it's time to upload it.
Click on Browse (Choose File if using Safari). Navigate to the image file name. Click on the file name to select it and click Open (Choose if using Safari).
Click on the Face It! button to upload the image.
Clicking the button also rebuilds all your pages, renames the image, and adds the following meta tag to the head section of the file...
<meta property="og:image" content="https://www.yourdomainname.com/site-concept-keyword-fb.jpg" />
For anguilla-beaches.com, the tag will be <meta property="og:image" content="https://www.anguilla-beaches.com/anguilla-fb.jpg" />
This meta tag ensures your control of your branding across all Like and comment thumbnails on your visitors' Facebook timelines.
A small version of your image will appear next to the Browse button. You'll now also see a Delete option.
You can select a new image by clicking Browse/Choose File again and clicking the Face It! button. Or add a check to Delete, click the Face It! button to delete the image, then return and add a new one with the Browse/Choose File button.
Important Note
If you change your OG Image, the quickest way to let Facebook know about the new image is to go to Facebook's "debug" tool at...
https://developers.facebook.com/tools/debug
Paste in a URL from one of your pages (copy it from the address bar of your browser). Then click on the Debug button.
That forces Facebook to visit that page, picking up your new OG Image, which it will then apply to all of your pages.
